Thinking about tackling a kitchen project? You might wonder, “How Do You Install an Over the Range Microwave Oven” by yourself. You can handle this job if you feel comfortable using tools and following directions. Always put safety first. Know your limits before you start.
Key Takeaways
Prepare your space by clearing the area and checking for studs. This makes installation easier and safer.
Follow the manufacturer’s guidelines for height and clearance. Proper placement ensures safety and convenience.
Always have a helper when lifting the microwave. This prevents injury and ensures secure installation.
Prepare before Installation

Before you start your over the range microwave oven installation, you need to get your space ready. A little prep work makes the whole process smoother and safer.
Clear the Area
Take everything off your stovetop and countertop. You want plenty of room to move around. Wipe down the wall and cabinets above your range. Grease and dust can make mounting tricky.Remove the Old Microwave or Hood
If you’re doing a replacement, unplug and carefully take down the old microwave or vent hood. Save any screws or brackets you remove—you might need them later.Check the Wall and Cabinets
Look for leftover brackets or hardware. Patch any holes and make sure the wall is solid. You want a sturdy surface for mounting your new microwave oven.Find the Studs
Use a stud finder to locate the wall studs behind your range. Mark these spots with a pencil. Most over the range microwave ovens need to anchor into studs for safe installation.Mark the Placement
Follow your brand-specific instructions for height and alignment. Use the mounting template that comes with your microwave. Double-check your marks before you drill.
Tip: Accurate marking and solid anchoring help prevent common mistakes during installation and venting. Take your time with this step!
Now you’re ready to move on to the main installation steps.
How Do You Install an Over the Range Microwave Oven: Step-by-Step Guide
If you’re ready to learn how do you install an over the range microwave oven, this step-by-step guide will walk you through every part of the process. You’ll find tips for safety, venting, and mounting, so you can feel confident about your microwave installation.
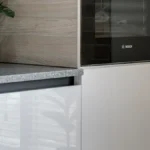
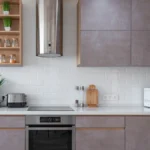
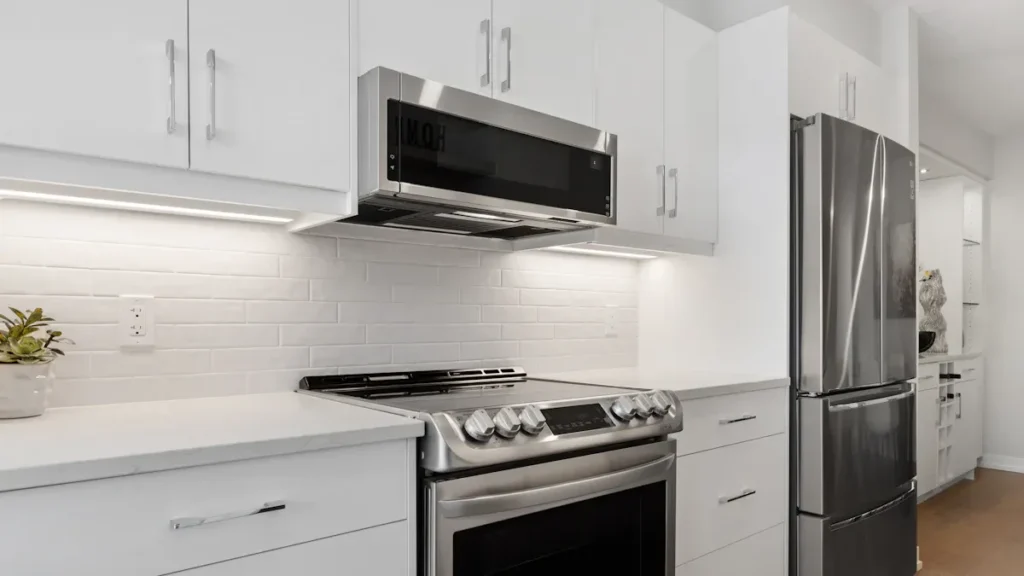
1. Choose the Installation Location
Picking the right spot is the first step when you install an over-the-range microwave. You want a location that’s safe, convenient, and meets all height clearance and codes. Here’s what you should consider:
Always check the manufacturer’s installation instructions for clearance requirements.
Place the microwave 24 to 48 inches above the floor for easy access.
Make sure there’s at least 12 to 13 inches of space above the range.
Keep 66 inches from the floor to the top of the microwave.
Avoid spots where you’d have to reach over hot surfaces.
Think about who uses the kitchen. Make it accessible for everyone, including kids and older adults.
Position the microwave near food prep areas and the fridge for convenience.
The minimum clearance above a cooktop is 30 inches to unprotected combustible material, unless your installation instructions say otherwise.
Tip: Always follow the manufacturer’s guidelines for safe installation. This helps you avoid mistakes and keeps your kitchen up to code.
2. Locate Wall Studs and Mark Mounting Points
Accurate measurements matter when you install an over-the-range microwave. Here’s how you can get it right:
Measure the width, depth, and height of the space above your range.
Use a stud finder to locate wall studs. Mark them with a pencil.
Make sure your mounting bracket will attach to at least two studs for stability.
Double-check your marks before you drill. This helps you avoid costly mistakes.
Note: Accurate marking and measuring are key for a safe and secure microwave installation.
3. Install the Mounting Bracket and Template
Now it’s time to attach mounting plate and use the template that comes with your above-the-range microwave.
Tape the paper template to the wall and upper cabinet, lining it up with your marks.
Drill pilot holes where the template shows.
Secure the mounting bracket to the wall, making sure you hit the studs.
If the bracket holes don’t line up with the studs, use round head bolts and toggles for extra support.
Safety Alert: Always use the right fasteners, like 2 1/2″ to 3″ bolts or 1/4″ lag screws, to keep your microwave secure.
4. Set Up the Ventilation System
Venting is a big part of how do you install an over the range microwave oven. You need to decide if you’ll use recirculating (non-vented) or ducted (vented) ventilation. Each method has its own steps and requirements.
Recirculating (Non-Vented) Installation
This setup filters air through charcoal filters and sends it back into the kitchen.
It’s easier to install since you don’t need ductwork.
Make sure you keep the filters clean for best performance.
Horizontal Wall Venting
This method vents air outside through a duct in the wall.
You’ll need to cut a hole in the wall and install ductwork.
Use rigid metal ducting for best results.
Vertical Roof Venting
This option sends air up through the cabinet and out the roof.
You’ll need to cut holes in both the cabinet and the roof.
Always follow venting requirements from your installation instructions.
Feature | Ducted Ventilation | Recirculating Ventilation |
|---|---|---|
Airflow Direction | Vents air outside the home | Filters and recirculates air in the kitchen |
Installation | Requires ductwork in walls/ceilings | Easier installation, no ductwork needed |
Efficiency | More effective at removing smoke and odors | Less effective, relies on filters |
Prep Venting Tip: Ducted systems remove smoke and odors better, but recirculating systems are easier to install.
5. Install the Exhaust Duct (If Required)
If you choose ducted ventilation, you’ll need to install the exhaust duct. Here’s how:
Use a 6″ duct, not a 4″ one. Smaller ducts can cause fan sputtering and reduce efficiency.
Avoid using flimsy materials like tin foil. Stick with rigid metal ducting.
Keep duct runs as short and straight as possible.
Seal all joints with metal tape to prevent leaks.
Mistake Description | Impact |
|---|---|
Using a 4″ duct instead of a 6″ duct | Causes fan sputtering and reduces efficiency. |
Reducing duct capacity by almost 2/3 | Limits the ability of the fan to exhaust air effectively. |
Using inferior materials (tin foil) instead of proper ducting | Compromises the integrity and efficiency of the installation. |
Venting Alert: Always check your microwave’s venting requirements and follow the installation instructions for duct size and materials.
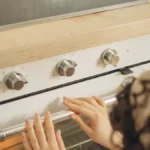
6. Lift and Mount the Microwave Oven
This step usually takes two people. Over-the-range microwaves are heavy, and you need to lift and secure microwave safely.
Place a blanket over your range to protect it.
Remove the glass tray and rollers from the microwave.
With a helper, lift the microwave and hook it onto the mounting bracket.
Tilt the unit up so it fits snugly against the upper cabinet.
Thread the power cord through the cabinet hole.
Safety Reminder: Never try to install an over-the-range microwave by yourself. Always have a helper to avoid injury and make sure you attach the microwave securely.
7. Secure the Microwave to the Upper Cabinet
Now you’ll attach the microwave to the upper cabinet:
Use the screws and bolts recommended in your installation instructions.
1/4″X20 3″ flat head bolts with flat washers work well for top screws.
Drill through the upper cabinet and tighten the bolts to hold the microwave in place.
Make sure the unit doesn’t wiggle or shift when you open the door.
Pro Tip: If the mounting plate holes don’t line up with the studs, use toggles for extra support.
8. Connect Power and Ground the Microwave
Plug the microwave into a three-prong outlet that’s properly grounded. This protects against electrical surges and keeps your home safe.
Make sure the outlet meets all grounding requirements.
Never use an extension cord for an above-the-range microwave.
Grounding helps prevent short circuits and fires.
Safety Check: Proper grounding is essential for every microwave installation.
9. Final Inspection and Safety Check
Before you finish, do a thorough safety check:
Safety Check | Description |
|---|---|
Grounding | Make sure the microwave is connected to a grounded wall socket. Improper grounding can cause electric shock. |
Inspection | Look for dents, scratches, or cracks. Check that the door aligns and seals properly. If damaged, do not use the microwave. |
Test the microwave to make sure it works.
Check for any movement or wiggling.
Make sure the venting system works and there are no air leaks.
Look for common mistakes like door damage, arcing, or EMF leakage.
Final Tip: If you notice any problems, stop and review the installation instructions. Don’t hesitate to call a professional if you’re unsure.
You’ve just learned how do you install an over the range microwave oven from start to finish. By following this step-by-step guide, you can avoid common mistakes and make sure your above-the-range microwave is safe, secure, and ready to use. Always remember to check venting, height clearance and codes, and safety at every step. If you ever need to replace an over-the-range microwave, these steps will help you get the job done right.
FAQ
How long does it take to complete an over the range microwave oven installation?
You can finish most installations in one to two hours. The installation guide helps you plan each step and avoid delays.
Do I need special tools for mounting my microwave oven?
You need basic tools like a drill, screwdriver, and stud finder. The installation guide lists everything you need for a smooth process.
Can I use the same installation guide for different microwave brands?
You should always check brand-specific instructions. The installation guide gives general steps, but each brand may have unique requirements.